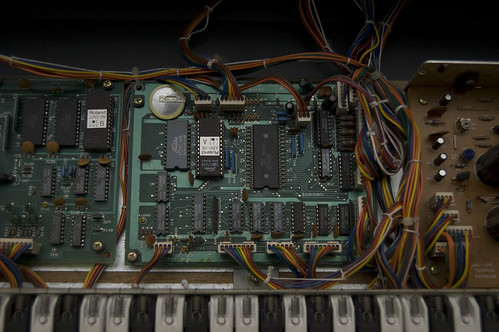
The Juno-106 battery failed last year and since I was in a rush to move, the synth was packed away into storage. Well since I am entirely moved and settled in, today became the fateful surgery day to help get some presets back online. At first, I figured it would be a simple procedure so I reached for a screwdriver and the soldering station. Opening the enclosure up is as easy as six screws. Each side has three screws towards the bottom of each end cap that release the top and bottom. Once they were removed, the entire top assembly along with the end caps flipped up to reveal the analog/digital guts to be examined. Located almost in the middle is the PCB that holds the battery. The little bugger was still soldered in just like the day it left the factory. I carefully removed and labeled each connector as I removed them to eliminate any confusion during reassembly. Easy enough. Next I took out each of the four screws that secure the PCB to the wood bottom. Again this was another easy step. Now I was in for the "work" part of this whole process. The battery was soldered in really, really good. I had to slowly work the battery clip free while being very careful not to heat the board up too much. Too much heat and I would run the risk of destroying one of the neighboring ICs or even destroying the PCB itself. Finally after some time I popped the part out and replaced it with a new battery holder. Soldered, screwed, connected, and the moment of truth was now upon me. I turned the synth on, loaded in the factory sounds, powered the synth down, and unplugged it. Okay, so maybe it wasn't the true moment of truth but I had some homemade chicken soup waiting and besides the synth needed some time without power just to make sure the battery was really doing the job. I came back about an hour later and turned everything back on. The Juno was working like a charm.
More images can be found on Flickr
1 comment:
Is it possible for someone to send me a side profile of the screw marked 'screw 2' in the first picture? I had lost this one and ordered a replacement set of screws from eBay but none of them seem to fit and there is no hole to screw it in as the bit it touches is a copper circle. It would be greatly appreciated if someone could do this for me. Thanks.
Iphone Repairs Sydney
Post a Comment